OAuth2 handshake process in a few cURL calls
What is the OAuth2 handshake after all? It seems magical, but in fact, it can be reproduced by a few command line calls.
The following describes the steps to retrieve your own profile user data from our profile server.
It doesn’t matter that we expose some secrets in this web page, all you will get access from this process is your own data anyway.
There is also a longer, in depth, version available at WPD/Projects/SSO/How_we_implemented_it
Requirements
- An account created on accounts.webplatform.org
- A command-line terminal with access to cURL (MacOS has one)
- A client_id:
e2aa7a52c84b396d - A client_secret:
e2d1f060cb9e15e7452fe907abb214d32290df72bf954a6149de966378b996fb - An OAuth server, and an OAuth protected API (see below)
Note: The both client_id, and client_secret are configured on WebPlatform OAuth server and, provided you finish the handshake, will redirect you to http://127.0.0.1:5000/login.
TL;DR
This process is about getting a one time code that you exchange for a "Bearer token". Once the steps are done, you will get redirected to http://127.0.0.1:5000/login?code=WHAT_WE_WANT.
Each steps along the way requires cURL, but one of them will have you If you have no web server on your own machine, it will just hang, but will have you what you seek for to finish off the steps.
Steps
Here are the steps of the OAuth handshake all through cURL. Except the login, that will make you use your own web browser and account details, of course.
Also, if we want to have a WPD/Projects/SSO/How_we_implemented_it#SSO_and_remembering remember my session and prevent us to ask for a password again, I pointed out where we could make it happen. Unfortunately for us, its not possible as it is right now.
1. Get handshake starting point details
Basically, its asking what data is related to this OAuth client so we can start the handshake.
Its a way to know if the service exists for the relying party, it lets you ask for name, image to represent that service, etc.
curl 'https://oauth.accounts.webplatform.org/v1/client/e2aa7a52c84b396d'
And the response body:
 {"name":"Annotator (local)",
  "image_uri":"...",
  "redirect_uri":"http://127.0.0.1:5000/login"}
Note that it gives the redirect_uri. As in, we don’t trust ANY data sent by the client, we’ll send it there ourselves.
2. Start the handshake
This step makes your browser go around through Response Location: header and change the browser location to that address.
An important aspect is that this HTTP call allows you to ask what you need ("scope"), and how to get back where you were afterwards ("state").
The state identifier is useful because since you are leaving your own application you might want to save the state somewhere else (e.g. Memcached) and give a key ("state") so we can resume it later.
The scope is a coma separated list of things the api exposes. This is very liberal, but this is how relying parties and providers gets ask the user to approve what he’s letting the APIs to communicate about him. In our case, our SSO accepts "session", we might have more later.
The request is very similar as #1. Get handshake starting point details step 1, but this time, we will get redirected around. Remember that this URL is called by the relying site and the browser follows the Location: response header.
curl -v 'https://oauth.accounts.webplatform.org/v1/authorization?scope=session&action=signin&state=8888&client_id=e2aa7a52c84b396d'
NOTE: That the scope, state, and action can by anything. Those are simply declared at the beginning of the proces, and adds entropy to the crypto stuff happening behind the scenes. The action=signin is a helper for the accounts server to know if we want to login or register. As for the scope=session, you can ask anything, only session will allow you to get things back in the end anyway.
In the response headers…
< HTTP/1.1 302 Moved Temporarily
< Server: nginx/1.4.6 (Ubuntu)
< Date: Fri, 18 Jul 2014 00:14:23 GMT
< Content-Length: 0
< Location:
https://accounts.webplatform.org/oauth/signin?scope=session&state=8888&client_id=e2aa7a52c84b396d
< access-control-allow-origin: *
< access-control-max-age: 86400
< access-control-allow-methods: GET, HEAD, POST, PUT, PATCH, DELETE, OPTIONS
< access-control-allow-headers: Authorization, Content-Type, If-None-Match
< access-control-expose-headers: WWW-Authenticate, Server-Authorization
< cache-control: no-cache
Location is there, let’s copy that, and paste it in your own web browser. You will need to sign-in.
Instead of doing like WPD/Projects/SSO/How_we_implemented_it#SSO_and_remembering remember my session, if our version of FxA had handled remember session, we could get right through. If that part was complete, it would “remember” you signed in already and we would already get to #4. Exchange the code for what we need with a code in hand!
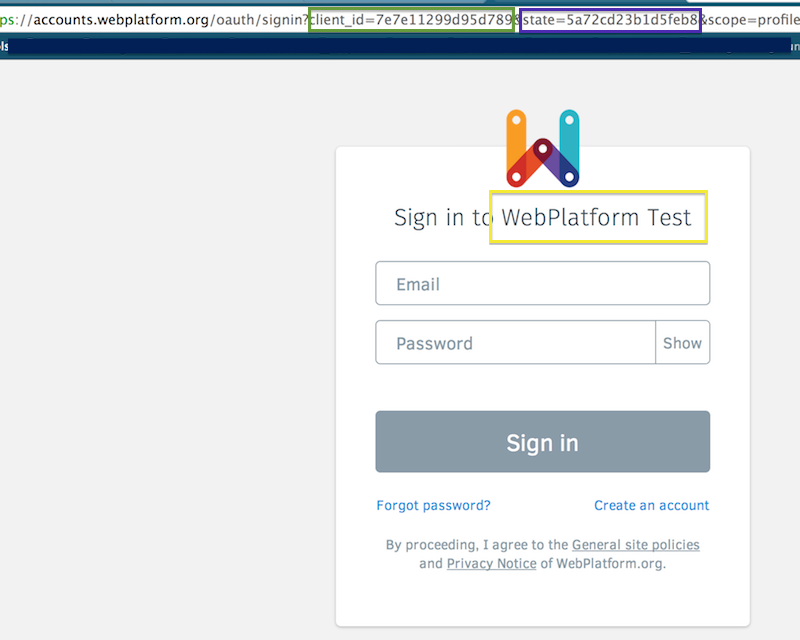
3. Go to the Location and ask the code
Use your web browser, and sign in.
https://accounts.webplatform.org/oauth/signin?scope=session&state=8888&client_id=e2aa7a52c84b396d
NOTE: Replace "WebPlatform Test", in the following image, for "Annotator (local)"
Once its done, you should be redirected with a code=... visible in the address bar:
http://127.0.0.1:5000/login?state=8888&code=a6373251b8a61808633cfe32f3518b01bad01a9010d3c18ed2072d5335b421bb
NOTE: The code is no longer valid (its a one time, remember), you will have to get your own.
Like previously said about the feature miss. We wouldn’t had needed to ask the user to login if it was complete, we would have had gotten back to the initiating web app, the notes server here, the code and could start a session in his own web app.
4. Exchange the code for what we need
This is done by the backend of the relying party site. The callback_uri expects a GET request with a &code=... string that it’ll communicate Off the band (i.e. from the web app server to the OAuth server, without passing through the visitor web browser).
Its an important concept because we are sending around the client secret. Even though we are using SSL, we want to be sure that the client_secret is sent to the network as less as possible. In this case, only registered relying parties and OAuth servers will see this data being passed around.
  curl -v -XPOST
    -H 'Content-Type: application/json'
    'https://oauth.accounts.webplatform.org/v1/token'
    -d '{"client_id":"e2aa7a52c84b396d", \
        "client_secret":"e2d1f060cb9e15e7452fe907abb214d32290df72bf954a6149de966378b996fb", \
         "code":"a6373251b8a61808633cfe32f3518b01bad01a9010d3c18ed2072d5335b421bb"}'
We get the token we wanted in the response body:
{"access_token":"f787622b3a7f818bceb9a7793f77afb669d72579325a7a9a3c853e540e5f5544",
  "token_type":"bearer",
  "scope":"session"}
NOTE: That bearer token is invalid (i changed it), you will have to get your own ;)
5. Ask stuff to an OAuth2 protected API
So far, only a few are available, the profile server which gives us back data for our own users.
  curl -H "Authorization: Bearer f787622b3a7f818bceb9a7793f77afb669d72579325a7a9a3c853e540e5f5544"\
      "https://profile.accounts.webplatform.org/v1/session/read"
And the response body would look like this:
{"username": "jdoe",
 "fullName": "John Doe",
 "email": "hi@example.org",
 "uid": "3E09D6DF843341BC921A25423AB83BAF" }